A very basic tutorial on how to get a sound analyzer up and running, in this case Smaart was used.
A rundown how to setup the basics:
Opening Smaart

When you open smaart, you are greeted with this fairly basic screen, this is the main window.
Config-IO

Press config in the top of your screen to open a dropdown menu. In the menu you will find the ”I-O Config” button.

You will be greeted by the configurator screen, this contains a number of options. The first screen is all about setting up the connections.
Making sure that Smaart knows which In and Outputs (IO) from your audio interface you want to use within the program. You can switch between in and outputs above the Device selection. Make sure if available, you pick the ASIO(win) / Core Audio(mac) drivers!

Config measurement

On the top edge of the cofigurator you can swap between IO config, measurement config and SPL config. When you go to the measurement config, you can add new TF measurements(transfer function) and spectrum measurements on the bottom of the window.
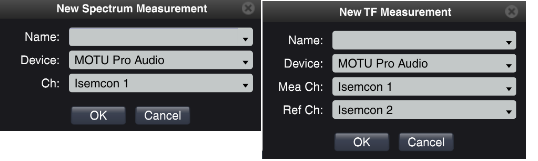
Here you can select the inputs you want smaart to use, and give it a functional name
Config signal generator

When you are set in the IO config + measurement config, It’s time to check and perhaps tell smaart what outputs to use. Open up the options dropdown menu, and find signal generator. Alternatively you can open this window by the hotkey combination (Alt+N) or use the button on the right side (you can click the text ”signal generator” to open up the config window)

This opens up the signal generator window, which shows you the device used, the main output, and the aux output used for the signal generator. In my case there is also an aux out selected, because that output is hardwired (using a custom rack) back into my audio interface, and i dont have to look for Y-split cables etc.
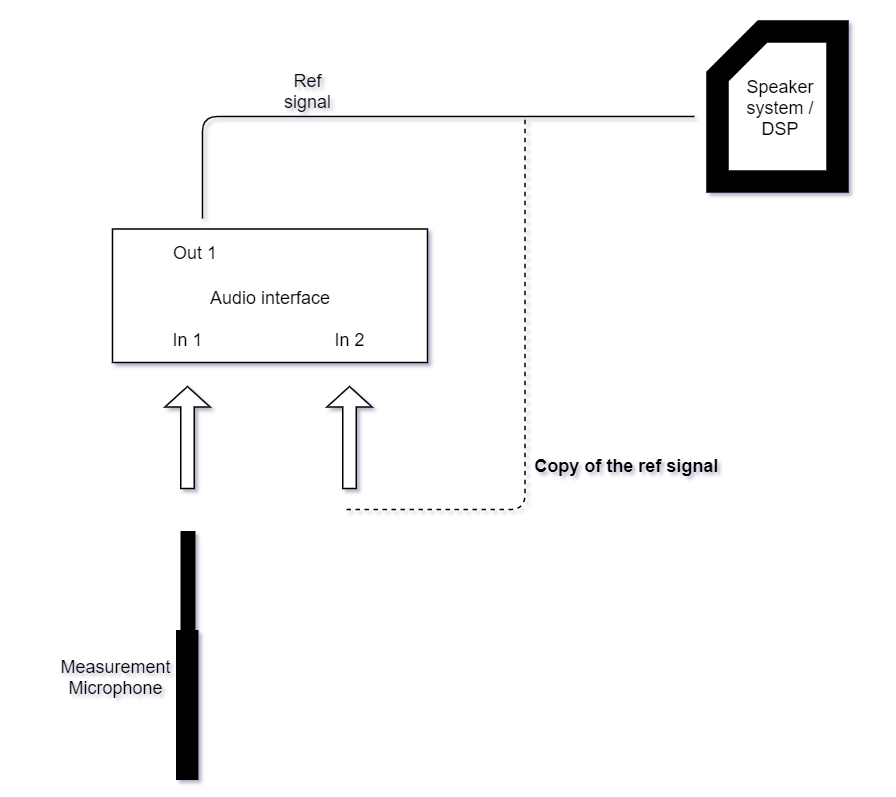
The general way to wire up your audio interface for an audio analyzer. There are 1001 different options, but this is the most basic way.
Another pretty important note from the Smaart manual: *NOTE*: While Smaart has the ability to reference transfer function measurements internally, by selecting the signal generator as your reference signal source, it is generally not a recommended practice. This often results in erroneous delay times as the latency from your I-O and the latency from the generator will not match. Some computers handle this better than others, but on the whole it is a better practice to use a hard wired loop back so that all of your signals are on the same clock.